Mastering Parallel and Perpendicular Line Segments in Geometry
Dive into the world of parallel and perpendicular line segments. Learn to identify, compare, and apply these crucial geometric concepts with clear explanations and real-world examples.

  1. Intros0/3 watched
  2. Examples0/10 watched
  3. Practice0% mastered
  1. 0/3
  2. 0/10
  3. 0%
Now Playing:Parallel and perpendicular line segments – Example 0a
Intros
0/3 watched
  1. How to use a protractor?
  2. What are parallel lines?
Examples
0/10 watched
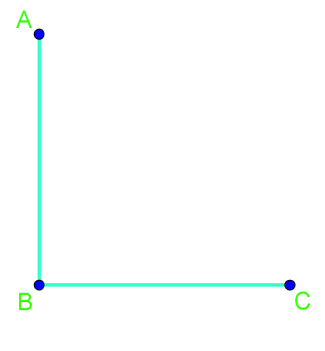
  1. Are line segments AB and BC parallel or perpendicular?
    perpendicular lines
    Practice
    0%
    Build your skill!Try your hand with these practice questions.
    Pairs of lines and angles
    Notes

    In this lesson, we will learn:

    • How to measure and draw angles using a protractor
    • How to identify whether pairs of lines or line segments are parallel or perpendicular

    Notes:

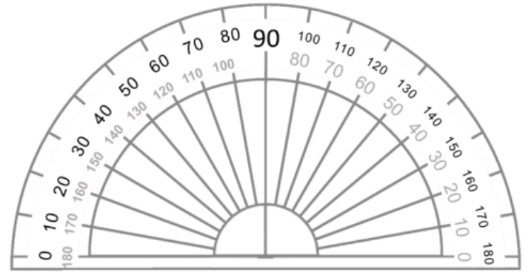
    • Protractors are used for measuring and drawing angles:
    Parallel and Perpendicular Line Segments
      • The middle of the flat side of the protractor goes on the vertex of the angle
      • There are two scales on the protractor from 0° to 180° (one going the clockwise way, one going the counter-clockwise way)
      • Line up one of the zeroes on the protractor with one arm of the angle and start measuring from 0° until you reach the other arm

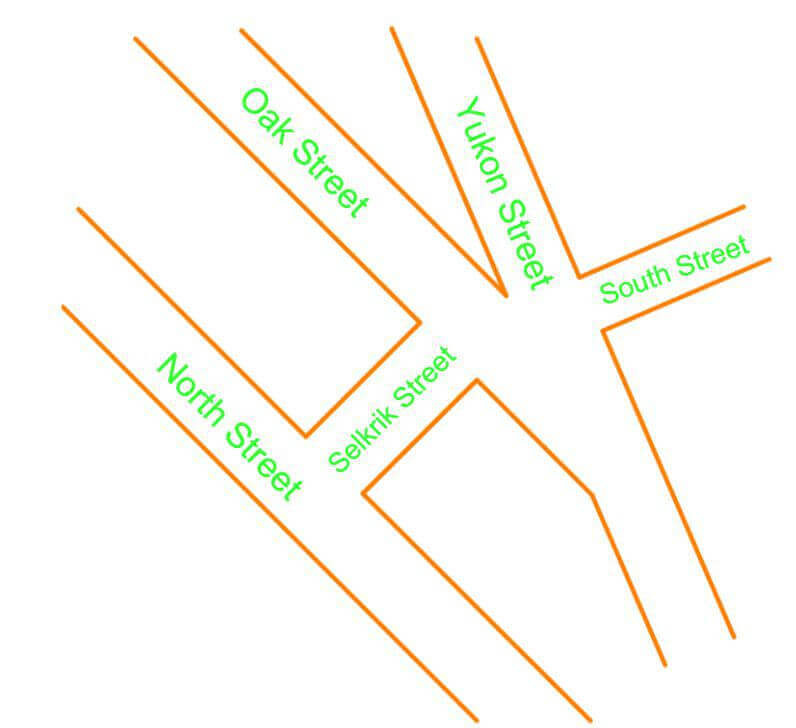
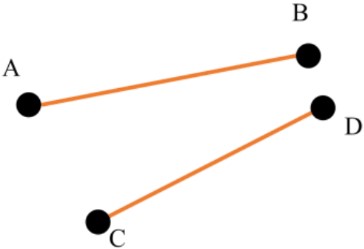
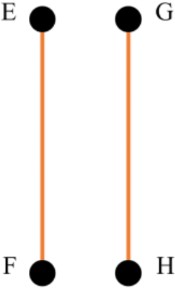
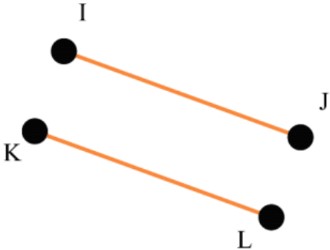
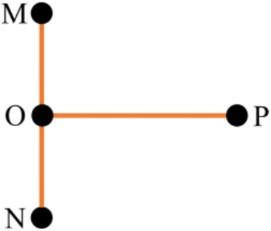
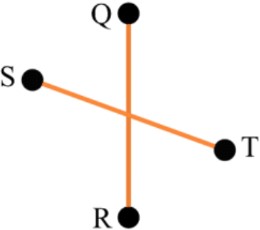
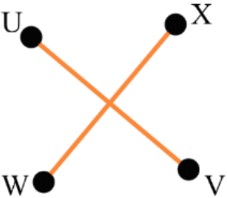
    • Two lines or line segments can either intersect (cross) each other or be parallel. In this section, we will be learning how to identify and draw parallel and perpendicular line segments. Parallel line segments never meet, no matter how far they are extended. Two line segments are perpendicular if they form a 90 degree angle where they cross. Parallel and perpendicular line segments are found everywhere in the world around us. For example, city planners often design roads to be parallel and perpendicular to each other. Along with roads, railroad tracks, lines on notebook paper, and bookcases are parallel.
      • When two figures are parallel with each other we can use the symbol: \parallel
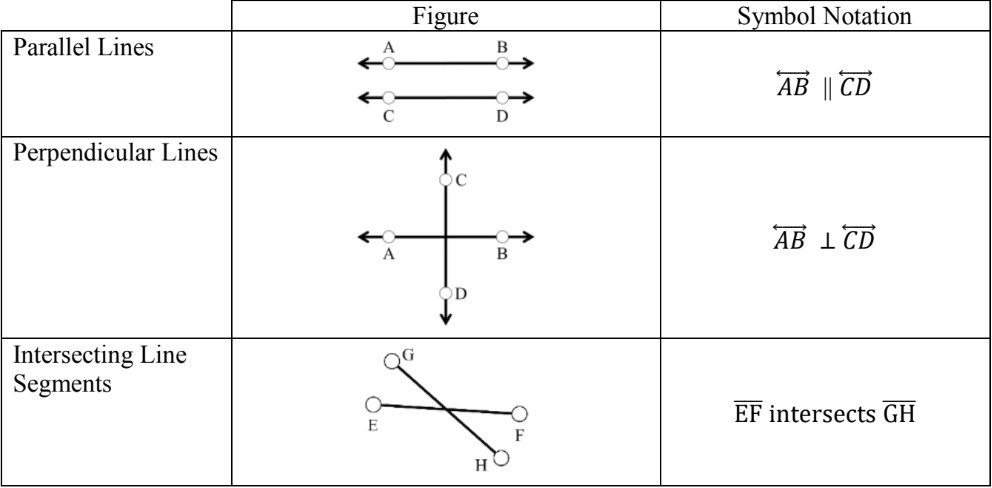
      • When two figures are perpendicular with each other we can use the symbol: \perp
    Points, Lines, Line Segments and Ra
    Concept

    Introduction to Parallel and Perpendicular Line Segments

    Welcome to our exploration of parallel and perpendicular line segments! These fundamental concepts are crucial in geometry and have real-world applications. Parallel line segments never intersect and maintain a constant distance between them, like railroad tracks. On the other hand, perpendicular line segments meet at a right angle (90 degrees), forming an "L" shape. Our introduction video provides a visual demonstration of these concepts, making them easier to grasp. You'll see how parallel vs perpendicular line segments differ and how they relate to various shapes and structures. Understanding these concepts is essential for solving more complex geometric problems. As we dive deeper, you'll discover how these line segments form the basis of many geometric figures and architectural designs. Whether you're studying for a test or simply curious about geometry, mastering parallel and perpendicular line segments will give you a solid foundation in spatial reasoning.

    Parallel line segments are often used in various engineering and architectural designs due to their stability and uniformity. In contrast, right angle intersections are crucial in construction for creating strong and stable structures. By understanding the principles of parallel and perpendicular lines, you can enhance your geometric problem-solving skills and apply them to real-world scenarios.

    Example

    Below is a line segment, AB. Draw a line segment that is perpendicular to AB.
    draw perpendicular

    Step 1: Understanding Perpendicular Lines

    To draw a line segment that is perpendicular to AB, we first need to understand what perpendicular lines are. Perpendicular lines are two lines that intersect at a 90-degree angle. A common example of perpendicular lines is the letter "T," where the top horizontal line and the vertical line meet at a right angle.

    Step 2: Visualizing the Perpendicular Line

    Imagine the letter "T" where the top horizontal line represents the line segment AB. The vertical line of the "T" will be the perpendicular line we need to draw. This visualization helps us understand that the perpendicular line will intersect AB at a 90-degree angle.

    Step 3: Using a Protractor

    To draw the perpendicular line accurately, we will use a protractor. Place the protractor on the line segment AB such that the midpoint of the protractor aligns with the point where you want the perpendicular line to intersect AB. Ensure that the baseline of the protractor is aligned with AB.

    Step 4: Measuring the 90-Degree Angle

    With the protractor in place, locate the 90-degree mark on the protractor. This mark indicates the direction in which the perpendicular line will be drawn. Make a small mark on the paper at the 90-degree point to guide your drawing.

    Step 5: Drawing the Perpendicular Line

    Using a ruler, draw a straight line from the point where the protractor's midpoint was placed through the 90-degree mark you made. This line will be perpendicular to AB, forming a 90-degree angle at the intersection point.

    Step 6: Verifying the Perpendicularity

    To ensure that the line you drew is indeed perpendicular to AB, you can use the protractor again. Place the protractor back on AB and check that the angle between AB and the new line is exactly 90 degrees. This verification step confirms that the lines are perpendicular.

    Step 7: Understanding the Geometry

    It's important to understand why the perpendicular line forms a 90-degree angle. A straight line measures 180 degrees. When a line is divided into two equal parts by a perpendicular line, each part measures 90 degrees. Therefore, the perpendicular line creates two 90-degree angles, confirming its perpendicularity.

    Step 8: Finalizing the Drawing

    Once you have verified the perpendicularity, you can finalize your drawing by darkening the perpendicular line. Label the new line segment appropriately to indicate that it is perpendicular to AB. This completes the task of drawing a perpendicular line segment to AB.

    FAQs

    Here are some frequently asked questions about parallel and perpendicular line segments:

    1. What is the difference between perpendicular and parallel lines?

    Parallel lines are two or more lines that never intersect and maintain a constant distance between them. Perpendicular lines, on the other hand, intersect at a right angle (90 degrees). Parallel lines have the same slope, while perpendicular lines have slopes that are negative reciprocals of each other.

    2. How do you find if a line is perpendicular or parallel?

    To determine if lines are parallel or perpendicular, compare their slopes:

    • Parallel lines: Have the same slope (m1 = m2)
    • Perpendicular lines: Have slopes that are negative reciprocals of each other (m1 * m2 = -1)

    If you have equations in the form y = mx + b, compare the m values. For point-slope form, calculate the slopes using (y2 - y1) / (x2 - x1).

    3. What are some examples of parallel and perpendicular lines in real life?

    Parallel lines examples:

    • Railroad tracks
    • Opposite sides of a rectangle
    • Lines on ruled paper

    Perpendicular lines examples:

    • The corner where two walls meet
    • The hands of a clock at 3:00
    • The edges of a sheet of paper

    4. How do you write a perpendicular line segment?

    To denote that line segment AB is perpendicular to line segment CD, you would write: AB CD. The "" symbol represents perpendicularity in geometry.

    5. What is a line segment and how is it different from a line?

    A line segment is a part of a line with two definite endpoints. It has a specific length and is denoted by the letters of its endpoints (e.g., AB). A line, in contrast, extends infinitely in both directions and has no endpoints or defined length.

    Prerequisites

    Understanding parallel and perpendicular line segments is a crucial concept in geometry and algebra. However, to fully grasp this topic, it's essential to have a solid foundation in certain prerequisite concepts. Two key areas that significantly contribute to comprehending parallel and perpendicular lines are trigonometry and linear functions.

    One important prerequisite is the ability to use tangent ratio to calculate angles and sides. This concept, often associated with the tangent ratio formula (Tan = opposite / adjacent), is fundamental in understanding the relationships between angles and sides in right triangles. The right angle definition is particularly relevant when dealing with perpendicular lines, as these lines intersect at right angles (90 degrees).

    Another crucial prerequisite is graphing from slope-intercept form y=mx+b. This skill is essential for visualizing and analyzing linear functions, which directly relates to understanding parallel and perpendicular lines. The slope (m) in the slope-intercept form plays a vital role in determining whether lines are parallel or perpendicular. Parallel lines have the same slope, while perpendicular lines have slopes that are negative reciprocals of each other.

    The point-slope form equation is another important concept that builds upon the slope-intercept form. It provides a different perspective on linear equations and can be particularly useful when working with parallel and perpendicular lines, especially when given a point and a slope.

    By mastering these prerequisite topics, students can develop a stronger foundation for understanding parallel and perpendicular line segments. The tangent ratio helps in comprehending the angular relationships, particularly in right triangles formed by perpendicular lines. Meanwhile, graphing linear functions and understanding different equation forms provide the necessary skills to analyze and compare the slopes of lines, which is crucial for identifying parallel and perpendicular relationships.

    Moreover, these prerequisites offer practical applications beyond just theoretical knowledge. In real-world scenarios, such as architecture, engineering, and design, the ability to work with parallel and perpendicular lines is invaluable. Understanding the underlying concepts of trigonometry and linear functions enhances problem-solving skills and spatial reasoning, which are essential in these fields.

    In conclusion, a solid grasp of these prerequisite topics not only facilitates a deeper understanding of parallel and perpendicular line segments but also provides a broader perspective on how these concepts interconnect within mathematics. This comprehensive approach to learning ensures that students are well-equipped to tackle more advanced geometric and algebraic concepts in their future studies.